Essential Oils

There’s A Volcano In My Bathtub!

Experiments In Acid-Base Chemistry

What do you get when you mix an acid with a base?

A party!

“It is like the acid and the base like each other so much

that they make the best of bubbly friends.”

This is one way that I explain the fun, interesting chemical reaction of acid/base mixing to little kids. I also make sure we talk a bit about the ph scale; where an acid and a base are on that scale; and how when mixed together, they meet in the middle becoming neutralized.

Mini Bathtub Volcanoes

Mini Bathtub Volcanoes

Acid & Base Fun For Little Ones

~ A Very Simple Experiment ~

Demonstrating this reaction for kids is easy.  Put a spoonful of baking soda in a clear glass then add a bit of vinegar and watch the bubbles!  This is a great time to talk about what exactly is happening inside the glass.

~ Blow Up A Play Dough Volcano ~

Every year we make a volcano at preschool filling it with a mix of baking soda, vinegar and food coloring to create an explosion!  It is always a major hit with the kiddos.  They love watching the volcano erupt over and over and over again.

This year we made our volcano with left over rose bud play dough and blue lava, kid's choice!

This year we made our volcano with left over rose bud play dough and blue lava, kid’s choice!

The coloring started to run out but bubbly white is fun too!

The coloring started to run out but bubbly white is fun too!

Materials ~ 

  • Play Dough, this is the perfect time to use up any old play dough you have lying around.
  • Vinegar, lots of it!  (this is the acid)
  • Baking Soda, lots of this too!  (this is the base)
  • Food Coloring, optional.  For our next volcano I think I will try using  beet powder instead to color our lava.  I love to find natural alternatives to food coloring.
  • A Pan with high sides

Instructions ~ Shape a volcano from play dough in your pan.  Use your hands to form a play dough cone, get the kids involved they love it! After you gather your audience, put some baking soda and coloring inside the volcano then add some vinegar and watch the fun!  If your kids are anything like mine, they will probably want you to blow it up again and again! It is fun to add a few “vents” by poking holes along the side of the volcano so the lava comes out there too.

~ Create Bathtub Volcanos ~

Follow up your volcano with mini bathtub volcanos for the kids to take home with them.  It is the perfect way to extend the learning and the fun!  These really are bath bombs; did you know that fun fizzing of bath bombs is all about acids and bases reacting?  Here is how to make your own! Mini Bathtub Volcanoes Materials ~ 

  • 1 cup Baking Soda
  • 1/2 cup Powdered Citric Acid  (this is the acid)
  • 1/2 cup Epsom Salts
  • about a tablespoon of Witch Hazel
  • 10 to 20 drops of Essential Oils, favorite kid safe options are lavender, sweet orange, rose geranium, cardamom, spearmint and ylang ylang.  We used lavender to keep things simple.
  • 1 teaspoon Oil, like almond, apricot kernel or olive oil .  We used a calendula and lavender infused almond oil.
  • Molds, we used plastic eggs to make tiny volcano shapes; I also brought some soap molds that I have on hand so kiddos could have a choice.

There are lots and lots of bath bomb recipes online.  After researching I decided to based our super simple bath bombs off Mountain Rose Herbs beautiful Rose & Geranium Bath Bombs.

 Instructions ~ First it is really fun to run another simple little experiment with the kids so they know exactly what is happening with these mini volcanos.  Once again we created an acid/base mix in a glass by putting one spoonful of baking soda and a 1/2 spoonful of citric acid in the glass.  And what happened?  Nothing.  Nothing happens until you get water involved.  So we added some water and bubbles! Next we made our volcano bath bombs.  If you are making this with a group of kids, I really recommend practicing because the process is a tiny bit fussy. First, mix all the dry ingredients together making sure to break up any lumps. mixing Carefully add the oil and essential oils while stirring to limit any bubbling action in your bowl. Finally add the witch hazel a bit at a time, again stirring while you go.  I actually put the witch hazel in a spritzer bottle and spray it in to the mixture a couple squirts at a time.  This worked really well for me.  Keep spraying and mixing until the mixture holds together when you squeeze it in your hand. Mold the bombs with the kids by having them tightly pack the mixture into a mold. ~ as I said I brought in a few different shapes to choose from with plastic eggs as one choice.  Using half off a plastic egg creates a little volcano shape.  You can use what ever you have on hand and even just shape them with your hands by squeezing the mixture into whatever shape you want.

Using A Heart Shaped Mold

Making Heart Shapes

Pressing mixture into a plastic egg.

Pressing mixture into a plastic egg.

Let the bath bombs dry for a few days before using.  So the kids don’t miss out on the fun make sure to let them know to get into the tub before they put the bath bomb in because it only fizzes for a minute or so.

Do you have a favorite way to experiment with acids and bases?

Our Volcanoes/Bathbombs  

Shared On: Eco-Kid’s Tuesday, It’s Playtime!, Kid’s Get Crafty, Tender Moments, Kid’s CoopFriday’s Nature Table

Categories: Aromatherapy For Kids, Baths, Essential Oils, Herbs For Kids and Mamas, Lesson Plans For Preschool And Home, Medicine Making, Playing With Herbs | Tags: , , | 7 Comments

Rosy Oatmeal Bath

Heart opening roses in the bath restores the nervous system while cleansing and toning the skin.

Oatmeal in the bath creates a rich mucilage that is extremely soothing to dry skin.  

Rose Geranium eases nervous tension and rejuvenates skin.

Pure simple delight!  

Rosy Oatmeal Bath

~ Make your very own Rosy Oatmeal bath  ~

In a cloth or muslin bag wrap:

  • 1 to 2 large handfuls of dried rose petals or rose buds (organic please!)
  • 1 to 2 large handfuls of oatmeal

Toss the bundle in the tub and fill with the hottest water from your faucet.  Let your bundle steep in the tub until the water is cool enough for bathing about 15 to 20 minutes depending on the heat of your water.

Next Add:

  • 6 to 10 drops of rose geranium essential oil
  • a handful of epsom salt, optional

Climb in and enjoy this super soothing, comforting bath!  Be sure to squeeze and squish your bundle of roses and oatmeal to liberate the slippery, milky goodness from the oats.  Use your bundle as a nice gentle scrub all over your body.  I even put some on my face and let it remain there for a while to nourish my skin.  Oh so simple and lovely…

After my bath ~

My skin was soft, so soft!  I felt truly relaxed, nourished and ready for the rest of my day.

If you are following me on the Nourishing Mama Mission, this is the third bath recipe to add to The Art of Bathing.  Thanks for reading and happy bathing!

Categories: Bathing, Essential Oils, Mama Care And Empowerment, Natural Family Care, Nourishing Mama Mission, Practices For Intentional Living, Roses | Tags: , , , | Leave a comment

Sleepy Time Foot Balm For Kids

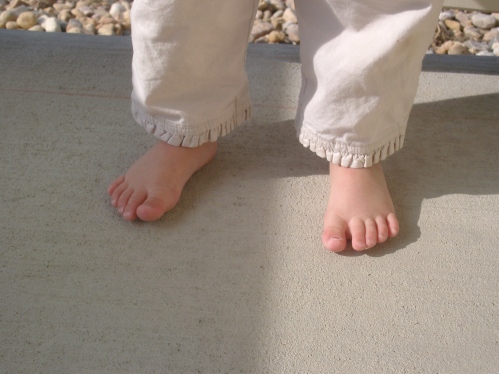
Who doesn’t like a good foot massage?  A nice rub is especially relaxing before bed.  Massage oils and balms made with essential oils massaged into the bottom of feet at bedtime helps to induce sleep as well as fight infection.

tooties

Did You Know ~ Our bodies are able to absorb a phenomenal amount through the skin on the bottom of our feet.  In fact an old remedy for coughs is to put rub the bottom of the feet with olive oil, put minced garlic on top of the oil and then put socks over the whole thing.  Within a very short amount of time the person’s breath will smell of garlic!  The garlic then helps to fight infection from the inside of the lungs out as the person breathes.


Creating Foot Balms With Kids ~ 

What is better than squishing and squeezing a bag of gooey goodness?  This is just what we did recently at preschool.  The kids each created their own sleepy time foot balm in a little baggie for mixing.  Originally we were going to use tins to put the balms in but what fun is that?

squishing foot balm

Gosh, their little hands were so busy, I had a hard time getting a clear picture! But you get the idea right? Squishing up stuff in a bag is super fun!

Materials ~

  • Shea Butter
  • Coconut Oil (optional)
  • Relaxing Essential Oils, Some Examples Are ~
    • cedarwood
    • lavender
    • petitgrain
    • sweet orange
    • ylang ylang
    • vetivert
    • sandalwood
    • frankincense
    • rose geranium

Instructions ~

  • Place a big spoonful (about a tablespoon) or two of the shea butter and coconut oil in a baggie.  
  • Let the children smell the essential oils and pick out a couple of their favorites that make them feel relaxed and sleepy.  
  • Add these essential oils to the shea butter/coconut oil blend.  Because this is a really loose project with no exact measurement for the shea butter/coconut oil blend, I errored on the side of too little essential oil, to be safe, rather than risk using to much.  So I used up to 6 drops of essential per baggie.  This means that if the child choose lavender, cedarwood and ylang ylang for the essential oils, I put 2 drops of each oil in their baggie for a total of 6 drops.  See Essential Oils for more information on using them herbal preparation safely.
  • Seal the bag shut tight!
  • Now for the fun part… Mixing it all up!  It is the child’s job to mix up all that goodness by squishing it around to their heart’s content!

squeezing foot balm

To Use ~

At bedtime rub a little bit of the balm on the bottoms of your child’s feet.  This is  a great time to connect with a little massage and conversation or lullaby.  Then cover your child’s feet with socks.  Off to slumber land they go!

More~ 

Nightmares And Night Terrors, What’s A Mama To Do?

Categories: Aromatherapy For Kids, Essential Oils, Foot Rubs And Soaks, Healthy Sleep, Herbal Tips And Tricks, Herbs For Kids and Mamas, Lesson Plans For Preschool And Home, Mindful Self Care, Parenting, Playing With Herbs, Practices For Intentional Living | Tags: , | 7 Comments

Soothing Herbal Bath For Irritated Muscles & Nerves

Frustrated, angry muscles and nerves plagued me over the past few days leaving me all sore and aching.  When I am sore I always try to fit in a nice hot soak in the tub.  Even with just epsom salts and hot water, I usually feel so much better after soaking.  This time I made my bath even more soothing with the following blend of salts and herbs ~ oatstraw to ease my nerves and rosemary for muscle soreness.  It worked wonders!


Make Your Own ~


In a cloth or muslin bag wrap:

  • 1/4 to 1/2 cup of dried rosemary leaf
  • 1/2 cup oatstraw

oatstraw filled bag

Toss the bundle in the tub and fill with the hottest water from your faucet.  Let the herbs steep in the tub until the water is cool enough for bathing about 15 to 30 minutes depending on the heat of your water.  The water will turn a buttery light yellow.

Next Add:

  • 1 to 2 cups Epsom salts
  • 1/2 cup baking soda
  • 5 drops ginger essential oil
  • 5 drops rosemary essential oil
  • 2 drops vetivert essential oil

My vetivert essential oil has turned into a thick syrup oil so I had to patiently wait for each drop to slowing make it’s way out of the bottle but it was so worth it!

After this bath I felt relaxed, centered and less soreness.  I took my bath quite hot and only stayed in for about 15 minutes, it was like soaking in an herbal hot springs.  Then I got out and laid on the floor with my feet on the sill of an open window.  I laid there breathing deep and relaxing.  As my body cooled down the tension drained out of my muscles.  I felt so calm and peaceful.  My muscles and nerves are finally nourished, letting go of tension…

Relaxedly yours…..

If you are following me on the Nourishing Mama Mission, this is the second bath recipe to add to The Art of Bathing.  Thanks for reading and happy bathing!

Categories: Bathing, Essential Oils, Mama Care And Empowerment, Natural Family Care, Nourishing Mama Mission, Oatstraw, Practices For Intentional Living | Tags: , , , , , | 2 Comments

Simplest Air Cleansing Humdifier

Here is one of my favorite ways to add moisture to the air in my home while also cleansing the air.  It is crazy, silly simple and I set this up any time the air just feels to dry (like it does right this second here in Colorado) or when some one in my family seems on the edge of getting sick.

Dried lavender perfect for steaming.

Make a herbal steam for your home…

Equipment ~

  • Big Pot
  • Lots of Water
  • Aromatic Herbs

Instructions ~

Fill the pot with water set it on the stove and bring it to a steamy simmer.  Then add your herbs.  If you have a nice big pot and plan to simmer for a while use a nice big handful of herbs to insure you get a nice amount of essential oils into the air.   That’s it!  Within minutes your house will fill with a lovely fragrant smell while moisture circulates easing dryness.   Be sure to choose herbs rich in essential oils such as rosemary, thyme, lavender, mint, lemon balm, basil, sage,  cinnamon, and cloves.  The simmering water releases the essential oils from the herbs into the air and the essential oils being anti-viral and anti-bacterial in-turn clean the air.  Plus your house will smell great.  If we are home, I let this simmer all day long adding water and even more herbs as the day goes on.  To insure safety keep an eye on your pot to be sure it doesn’t boil dry.

My daughter recently had a slumber party and before her guests arrived I set up a pot on the stove with the simple additions of cinnamon sticks and cloves.  Every person who entered our home commented on how great it smelled!

Categories: Cinnamon and Spices, Essential Oils, Herbal Tips And Tricks, Lavender, Natural Family Care, Peppermint, Practices For Intentional Living, Winter | Tags: , | 2 Comments

Create a free website or blog at WordPress.com.