Cinnamon and Spices

Simplest Air Cleansing Humdifier

Here is one of my favorite ways to add moisture to the air in my home while also cleansing the air.  It is crazy, silly simple and I set this up any time the air just feels to dry (like it does right this second here in Colorado) or when some one in my family seems on the edge of getting sick.

Dried lavender perfect for steaming.

Make a herbal steam for your home…

Equipment ~

  • Big Pot
  • Lots of Water
  • Aromatic Herbs

Instructions ~

Fill the pot with water set it on the stove and bring it to a steamy simmer.  Then add your herbs.  If you have a nice big pot and plan to simmer for a while use a nice big handful of herbs to insure you get a nice amount of essential oils into the air.   That’s it!  Within minutes your house will fill with a lovely fragrant smell while moisture circulates easing dryness.   Be sure to choose herbs rich in essential oils such as rosemary, thyme, lavender, mint, lemon balm, basil, sage,  cinnamon, and cloves.  The simmering water releases the essential oils from the herbs into the air and the essential oils being anti-viral and anti-bacterial in-turn clean the air.  Plus your house will smell great.  If we are home, I let this simmer all day long adding water and even more herbs as the day goes on.  To insure safety keep an eye on your pot to be sure it doesn’t boil dry.

My daughter recently had a slumber party and before her guests arrived I set up a pot on the stove with the simple additions of cinnamon sticks and cloves.  Every person who entered our home commented on how great it smelled!

Categories: Cinnamon and Spices, Essential Oils, Herbal Tips And Tricks, Lavender, Natural Family Care, Peppermint, Practices For Intentional Living, Winter | Tags: , | 2 Comments

Cinnamon ‘n’ Spice Ornaments Herb Style

Cinnamon Ornaments

Here is our second round of cinnamon ‘n’ spice ornaments!  We had so much fun coming up with ways to decorate using botanicals.  Check out my other post Cinnamon ‘n’ Spice Ornaments Craft Style for full instruction on how to make this aromatically stimulating craft.  Trust me these are easy, stimulate a lot of imagination in kids and smell amazing!  You won’t be disappointed.

We found that using herbs to decorate worked best in two different ways:

  • First, if you want to press the botanical into the ornament while it is wet, like with cloves or rose buds, it is best to leave the ornament in the cookie cutter while you and placing the botanical.  Otherwise the dough kinda of falls apart and then you have to start all over again.
  • Second, you can simply glue the herb to the ornament once it is dry.  This worked best for star anise, lavender blossoms and hawthorn berries.  A hot glue is the best choice for attaching large pieces while you can use school glue for small things like lavender blossoms.

Carving

My little one tried her hand at carving a shape.  It was a good experiment.

Unfortunately, it did hold together as well as the ornaments we cut out with cookie cutter.

Anise star heart

For this one we pressed cloves around the edge and then let the ornament dry before hot gluing a lovely star anise in the center.

Rose bud star

I love little baby rose buds, don’t you?

These all had little stems that we pressed into the dough.

Lavender Heart

This was super easy.  Once the ornament was dry we covered the top with a thin layer of white glue and pressed lavender blossoms all around the top.  I think this would be lovely done with something like anise seeds too.

Herbie gingerbread person

Decorated by my sweetie with hawthorn berries and cloves.

Kids love to decorate gingerbread people!

Herbie gingerbread person

Another creation.  This one has a bit of star anise for a smile.

The two gingerbread people are “married” according to their little creator.

Christmas Tree


Christmas tree complete with a shining star on top!

We love crafting for the holidays!  Do you enjoy making things with your kids?  I would love to hear about it!

Happy Holidays!

Categories: Aromatherapy For Kids, Cinnamon and Spices, Essential Oils, Herbal Crafts And Projects, Herbal Gift Ideas, Herbs For Kids and Mamas, Parenting, Playing With Herbs, Winter Holidays | Tags: , , | Leave a comment

Cinnamon ‘n’ Spice Ornaments Craft Style

Combine a lot of cinnamon with some applesauce and what do you get?  A delicious smelling dough for crafting!  Add some ginger, cloves and orange essential oil and the dough becomes incredibly fragrant, almost enchanting in its olfactory expression.  Oh my…

cinnamon and sparkles

These lovely ornaments are decorated with crafty stuff like glitter and glue. Next week, after I have a chance to make some of these with my kids, I will have a post about ornaments decorated with herbie stuff for a more natural look!

We made these ornaments at preschool to decorate for our holiday show this Friday night.  When I brought in an example ornament the kids all exclaimed, “Cookie!”  Which prompted a discussion about if  it would be OK to eat our ornaments.  Once I was sure the kids would refrain from taking a nibble, we started making our dough.  As usual we sat in a circle on the floor to work together bringing all us right in to the activity.

mixing it up

Making The Ornaments

Ingredients ~

  • 1 1/2 cups of ground cinnamon (can be expensive right?  I got mine in a huge jar at Costco for $3!)
  • 1/2 cup of other ground spices such as ginger, allspice, nutmeg, cardamom and cloves.  We used cloves and ginger a 1/4th cup each to make our super yummy smelling ornaments
  • 10 drops of sweet orange essential oil
  • 1 to 2 cups of applesauce
  • 4 Tbsp school glue, like Elmer’s

Instructions ~

Put all your ingredients in a bowl starting with 1 cup of applesauce and mix it up.  (We passed the bowl around our circle so everyone got a chance to stir and smell our creation up close.)  You want the dough to be firm and a bit wet.  It will be sticky but not so sticky that it is hard to work with.  If it is too dry and crumbly, add more applesauce a little at a time.  If it is too wet, add more cinnamon.  Next dust a table with some cinnamon and then dump the dough out on the table.  You can either roll it out or just pat it down until it is about a 1/4″ thick or so, if you make it thinner than  1/4″ your ornaments will be more likely to break.  Trust me, I know!  Let the kiddos help you pat it down if they want, they like this part.  If your dough is cracking when you roll/pat it out then it is too dry so add a bit more applesauce.  No need to put it back in the bowl, you can just mix it on the table.

all ready to cut out

After you have your dough flatten out to a 1/4″ or so, then it is time to cut shapes with cookie cutters.  Let the kiddos cut out their shape and the use a straw to make a hole in the ornament for a string to go through.

cutting the dough

Using a spatula place the ornament on a cookie sheet or drying rack and let it dry for a few days.  You can also place them in a 170 degree oven for a few hours to dry being careful to check them and turn them often so they don’t burn.  Once they are dry, they are ready to decorate or to simple hand with a pretty ribbon.

cinnamon dough

Ideas For Decorating ~

Crafty

  • glitter
  • glitter glue which could be like “piping” frosting on a cookie
  • small pom poms
  • sequins
  • small gems
  • paint, don’t cover completely or you may lose the smell
  • beads to decorate a ribbon or chenille stem for hanging

Herbal 

  • cloves ~ can you shove them into the dough before it dries?
  • rose buds
  • lavender blossoms
  • anise stars
  • elder berries or other berries

We didn’t use any of these at the school and I am excited going to experiment at home with my kids!  

We finally had time to play!  Check out our herbie decorated ornaments!

Ornaments

My nightmarish experience with cinnamon ornaments and eight little preschoolers….

In some ways these couldn’t be simpler to make but I must confess that I had a bad time trying to make these a few years ago when I started teaching at the preschool.  Here is what happened…  After making a succesful test batch at home with my little girl, I went into the preschool all ready to have a fun day with the kids.  Unfortunately, when we made our dough it was too sticky so we needed to add more cinnamon.  Problem was, all the cinnamon was gone.  So we added flour.  Not a good idea.  The dough became very sticky and the kids had their hands in it at the time.  So there I was with eight freaked out little kids, hands covered in globby goop.  Luckily the other teachers at the school helped out and we got everyone cleaned up in no time.  Whew!  So it was with a bit of trepidation that I made these this year at the school and I am so glad I did!

More Ways To Play With Cinnamon:

Shared On: The Kid’s Co-op, The Imagination Tree

Categories: Aromatherapy For Kids, Cinnamon and Spices, Essential Oils, Herbal Crafts And Projects, Herbal Gift Ideas, Herbs For Kids and Mamas, Lesson Plans For Preschool And Home, Playing With Herbs, Winter Holidays | Tags: , , | Leave a comment

Cinnamon Day ~ Herbs For Kids ~

When I share herbs with kids I love to do it on as many levels  as possible, engaging all their senses.  Of course taste, touch and smell are huge when working with herbs plus most herbs are a visual feast for the eyes.

This day,  cinnamon day, was no exception.  Cinnamon is delicious and approachable often bringing up memories of comfort from home with its sweetly spicy taste, yummy fragrance and warming properties.  It is a great herb for working with kids.  They simply love the taste, the smell and it is a familiar herbs for most.

Cinnamon Milk

We had an absolutely lovely, cozy day playing with cinnamon.  I made the kids warm cinnamon milk for snack time which they LOVED.  Making cinnamon milk is so easy and at the same time tastes so special.  Because the preschool I work at is vegan, I used almond milk for the kiddos combining it with a bit of cinnamon, enough to really flavor the milk without being overwhelming, and then heated it to a nice warm drinkable temperature.

Cinnamon Play Dough 

Our hands on experience was making cinnamon play dough.  I have a great love of play dough stemming back from my childhood and combining herbs with play dough is just about one of the best things ever in my opinion!  I made a big supply of fresh play dough and brought it in still warm for the kiddos to enjoy.

As the kids playing I sprinkled on ground cinnamon and the warmth of the play dough interacting with the cinnamon made for a lovely smell.  We also added a bit of orange essential oil to the play dough for an extra dimension of fragrance.

I brought in lots of cinnamon sticks for them to use with the play dough.

Play Dough Recipe

  • 1 cup of flour
  • 1/2 cup of salt
  • 1 cup of water
  • 1 1/2 tsp cream of tartar
  • 1 tbsp oil

Optional: powdered herbs for color, either mix in when cooking (can give more even color) or let the kids mix in at the table.

Combine dry ingredients in a sauce pan.  Add the water and oil.  Stir together and heat slowly over low heat.  Stir almost constantly until the play dough sets up.  Let it cool to warm before playing, play dough right off the stove is hot.

While they played I read the story of Cinnamon, Queen of the Spices from A Kid’s Herb Book by Lesley Tierra.  If you haven’t checked out this book, you really are in for a treat when you do!  It is chock full of ideas, stories, recipes and herbal inspiration for kids.

Cinnamon Day was a simple creative day of great fun and rich experience.  A time to connect with a beautiful tasty plant friend.

Click for more information on cinnamon

Shared On: The Kid’s Co-op, It’s Play Time!, Kid’s In The Kitchen, Eco Kid’s Tuesday

Categories: Cinnamon and Spices, Herbal Crafts And Projects, Herbs For Kids and Mamas, Lesson Plans For Preschool And Home, Play Dough, Playing With Herbs | Tags: , , , | 13 Comments

Elderberry Day ~ Herbs For Kids ~

As a preschool teacher and a parent, I am always on the look out for ways to help kids learn about staying healthy during cold and flu season.  So every year, just like I do at home, I make elderberry syrup with the kids at preschool.

Tea Tasting

We start off with a tea tasting at snack time.  I make a simple elderberry tea for the kids to try and with out a hitch almost every child loves it every year.  This is a great way for the kids to have a chance to really get up close and personal with elderberry.  We look at the color and while they taste the yummy berry-ness of the tea, I tell them about the benefits of elder.

To make tea just pour a quart of boiling hot water over about a 1/4 cup of elderberries and let steep for at least 15 minutes.  Then strain.  Add a bit of honey or agave to taste if so desired.

Making Elderberry Syrup

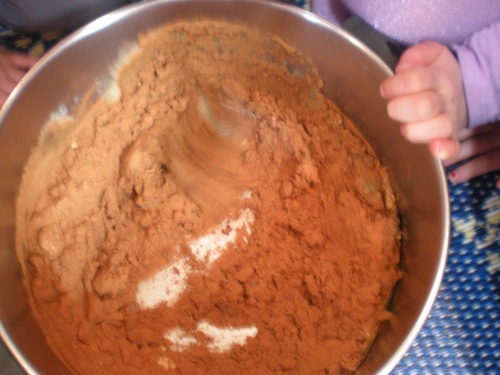
We dump the elderberries in a big pot and then add cinnamon chips, cloves, orange peel and ginger.  As we do this, I show them each herb, letting them sniff  while we talk about each one.  Just touching briefly on what they are and why we are using them.  Next, is everyone’s favorite part, stirring the herbs!  After each child has stirred the pot we add water and set it all on the stove to simmer.  Normally when I making syrup at home I let my kids smash the berries and herbs together with a potato smasher once they have softened in hot water.  The smashing is my children’s favorite part of making syrup , but I don’t do this at the preschool.  The thought of managing 15 preschoolers while the smash stuff up in hot syrup is terrifying!

Note:  I finished up the making the elderberry syrup during lunch and bottled it in little quart jars I brought in for each child.  Just enough for them to take home and share with their families.

For more information about making your own elderberry syrup click here.

For general information about elder click here.

The Germ Experiment

While the syrup cooked up we did another experiment.  The Germ Experiment.  I do this every year and it is always a big hit with the kids.  We start talking about germs.

What are they and where are they?  Here is what they had to say:

  • Green stuff
  • Things that get you sick
  • Germs are all over your boogers
  • Their little, teeny wheeny
  • In the sink

Next we played a game.  I pretended to sneeze in my hands and then pretended pick my nose and then I shook hands with the person next to me.  And they shook hands with the person next to them and so on.  Each time someone shook hands we stopped and talked about where the germs were now.  And I said they are on me, and you, and you, and you.  The kids thought this was great (lots of giggles) and really seemed to understand that dirty hands pass on germs.  So of course next we discussed hand washing and sneezing/coughing in our elbows.

During the next part of our game we had to be scientists and doctors.  When I asked them what scientists and doctors are they has this to say:

  • They study things
  • Help you feel better
  • A kind of grown-up that sneaks around
  • They do experiments and activities.

So we decided that we would run an experiment and observe what happens.  I sprayed each child’s hands with a lavender spray (this was our gooey nose stuff) and then sprinkled their hands with glitter (this was our germs) and then told the kids to go and play for a few minutes.

They raced all over the school touching things and playing.  Then I called them back over and asked them to go around and find the “germs” in our school that came off their hands.  Of course they found glitter everywhere!  And they seemed to realize that if they don’t wash their hands, they spread their germs.  At least I hope.  Yet, the next day I came to school, one of those sweet little boys had his finger in his nose, ah well..

Extra Info Just For Teachers

Here is a note I send home every year with the syrup.  Feel free to copy it if you want to try this at your school!

Dear Parents,

Here is a taster of elder berry syrup that we made today.  Please refrigerate what you don’t use.  Consume within 3 months of today ________.  Below is some information on elder berry including a recipe for making your own syrup.  When you are done with your syrup please wash and dry your jar, then return to the school so we can fill it up again with something magical!

Elderberry for Winter Health

As we all know the coming Fall and Winter bring to us not only beautiful brilliantly colored crisp days and fun in the snow, but also seasonal illness such as colds and flues.  Young children, who are building their immune systems, often get hit extra hard during this time of year.  There are amazing plant allies who can help the whole family stay nourished and healthy during the months ahead.  One example is elder and its berries which have an extensive traditional use as a preventative for the flu and as a support during the flu.  In fact modern research has found elderberries to be active against the flu virus.  You can make a yummy syrup from elder berries to take on a regular basis during flu season or a ready made preparation of elder berry named Sambucol can be found at most natural food stores. If despite your best efforts, sickness should take hold, syrups can be used during a bout of the flu to hasten healing.

We make the following easy delicious recipe for syrup every year:

~ Elderberry Syrup ~

  • One cup of fresh or ½ cup of dried elderberries
  • 1 to 2 tsp of whole cloves (use less if you are using ground cloves)
  • 1 to 3 tsp of cinnamon chips (use less if you are using ground cinnamon)
  • 1 inch of fresh ginger root, chopped or 1 to 2 tsp of powdered ginger
  • the peel of one organic orange
  • 3/4 cup of raw unprocessed sugar or honey.  We used sugar today.
  • Honey and sugar act as preservatives.
  • 3 cups of water

Simmer the elderberries and spices in 3 cups of water.  Mash the berries with the water and spices and cook at a low boil for about a ½ hour or until the liquid reduces by one-half.  Strain the mixture with a fine mesh strainer (make sure to get all the seeds out, which can be somewhat irritating to the digestive tract) and return the liquid to the pot and add the sugar or honey.  Heat until the sugar or honey just melts.  Then bottle, label and refrigerate your new syrup.  It will keep in the refrigerator for about three months.  Take two to three teaspoons for adults and 1 teaspoon for children (ages 2 and up) 3 to 5 times a week as a prophylactic during flu season.  If you do happen to get sick with a bout of the flu take the same dosage about four times per day.  Only the blue elder berries (Sambucus nigra) should be used as the red ones are toxic.  Elder berries are generally considered to be quite safe though they can be drying and irritating for folks suffering from migraines.  If you have a reaction, stop taking it immediately.  From Brigitte Mars’s Elder

The spices included in this recipe not only make it taste delicious but also help to warm the body, decrease inflammation and support healthy digestion.  Other herbs can be added to this syrup to increase its protective properties.  Rose hips are soothing and will provide nourishing vitamin C and bioflavonoids.  Astragalus has long been used in Traditional Chinese Medicine as a tonic to the immune system particularly to prevent illness.  However, this herb should not be used during illness as it can drive infection deeper into the body.  So do not take astragalus during the flu or cold. Another great herb for children’s health is lemon balm.  This yummy plant is antibacterial and antiviral, while also calming the digestive and nervous systems.  Add any of these herbs by the handful to the pot with the elder berries; also add a little extra water during the simmering and a bit more honey or sugar at the end.  Enjoy!

You can find everything you need to make your own syrup at Rebecca’s Herbal Apothecary and Supply at 1227 Spruce Street in downtown Boulder and at Vitamin Cottage as .well as online at mountainroseherbs.com.

Shared On: The Kid’s Co-op

Categories: Cinnamon and Spices, Elder, Herbal Crafts And Projects, Herbal Medicines, Herbs For Kids and Mamas, Lesson Plans For Preschool And Home, Natural Family Care, Playing With Herbs, Syrups, Winter | Tags: , , | 6 Comments

Create a free website or blog at WordPress.com.