Science Exploration

♥ Summer Herb Camp: Week Six Playing With Science ♥

Welcome to Mama Rosemary’s Herb Camp

Join us every week for a fun round up of projects and ideas to do with your kids during the summer.  Each week will have a theme with lots of projects to do using herbs, exploring science and natural, holistic living plus some great crafts for good ol’ fashion fun!  Many projects can be adapted for multiple age ranges depending on your child’s interests and developmental stage.

Our sixth week of summer camp is all about being scientists while having lots of fun!  

Projects and Experiments

These projects and experiments are great ways to introduce kids to some basic scientific concepts while engaging the child in learning about the world around them.  

Just click on the below pictures to get full instructions.

… talk about dissolving solids in liquids and make a saturated solution.  Then use that solution to grow beautiful crystals!

crystal

… make super silly friends that show how oil and water don’t mix.  Plus these friends are a great tool for helping kids calm down when they are upset.  

medfriends

... discover the fun or acid/base reactions!

volcano2

... talk about the three states of matter while create an aromatic cloud in a pot all while making an aromatic hydrosol.  

hydrosol3

... explore the powers of weather and erosion.  

OLYMPUS DIGITAL CAMERA

... if you haven’t already, visit our previous week of camp when we did lots of fun stuff in the garden.  Here you will find butterfly life cycles; helpful worms and ladybugs; botany with an examination of the inside of a flower; and a couple of fun ways to grow your own plant babies!

gardenadventures

I am so glad you stopped by!  

Please join us again next week!  

More Summer Herb Camp ~

Shared On: The Kid’s Co-opEco-Kid’s TuesdayKid’s Get CraftyIt’s Playtime


Categories: Herbal Crafts And Projects, Herbs For Kids and Mamas, Nature Exploration, Parenting, Science Exploration, Seasonal Herbal Crafts, Summer, Summer Herb Camp | Tags: , , , | Leave a comment

How To Make A Hydrosol

hydrosol1

To me the scent of wild things, of plants and flowers is truly enchanting and brings great joy to my life.  Essential oils and hydrosols capture a bit of that magic for us humans to enjoy any time.   Hydrosols are the aromatic water that is created during steam distillation of essential oils.

Hydrosols are different in their healing properties than aromatherapy spritzers where essential oils are simply added to water.  This is because in addition to small amounts of essential oil, hydrosols also contain water soluble healing compounds.  Among these compounds are plant acids which lend themselves beautiful as toners for the skin.  Hydrosols are generally considered to be gentler and safer to use than their essential oils counter parts.  According to Sagescript hydrosols “contain the beneficial products of essential oils plus more and in a less concentrated, safer form.”

You can use the following method* to make homemade hydrosols from any number of fresh plants and flowers.  Consider using roses (of course!), lavender, calendula, lemon balm, catnip, rosemary and any other fragrant or soothing plant.  I think chamomile would be especially nice.

Today we are making peppermint hydrosol.  The good folks at Mountain Rose Herbs say that peppermint hydrosol is great for cooling down on a hot day and that it is “it is particularly helpful for abrasions, hot spots, and as a facial toner.”  I think it will make a perfect spray or compress for cooling down on a hot day.

~ Materials ~

  • Large pot with a lid, a pot for canning works great for this.
  • Small bowl or container to go inside your pot to collect the hydrosol.
  • Something heat-proof to stand the smaller container on inside the large pot, a jar rack works perfectly for this.  If you don’t have one of these don’t despair.  Try using heat-proof ramekin instead.
  • Water, distilled or filtered
  • Ice cubes
  • Peppermint (or other plant material)

~ Method ~

Place the rack or ramekin in the bottom of the large pot and put the small bowl or container on top of the rack/ramekin.

still1

Next fill the bottom of the large pot with plant materia.  You want the plants to reach up to the smaller bowl.  Then fill with water until the plant material is just barely submersed.

still2

Finally put the lid to your larger pot upside down on top of the large pot and fill it with ice cubes.

still3

Heat this whole set up just enough for the water surrounding the peppermint to steam but not boil.  Let it work it’s magic for 20 minutes or so.  We used a clear lid so we could watch the hydrosol condense!

~ How It Works ~

The water will steam the plant material carrying all the goodness from the plant into the air.  The steam collects on the lid of the pan and condenses due to the ice cubes.  Because the pot lid is upside down, as the steam turns back into a liquid the liquid is directed to drip down into the smaller bowl.  This liquid is your hydrosol!  Pretty cool, uh?

Please store you new hydrosol in a dark glass bottle in the refrigerator.

Enjoy!

~ How to get kids involved with this project ~

If you have read my blog for long, you know that sharing herbs with kids is a great passion of mine.  So of course, getting them involved in this fun project is a big plus for me.  Here are a couple of ideas for sharing the fun with little ones!

  • harvestingmintHave them help you harvest the peppermint.  Explain to them that cutting the mint right above the point where two leaves sprout off the stem helps the plant to grow two new stems.  This is because there are baby leaf buds nestled in right above each individual leaf.
  • Ask the child to help you set up your still.  And share with them what is going to happen.  This is a great time to talk about water and all of its forms.  The liquid water in the big pot will heat up and turn into gas or steam.  This is like a big peppermint infused cloud.   The solid water in the form of ice cubes will help the steam cool down and “rain” into the bowl.
  • Explore your new hydrosol together.  Spray it on yourselves and talk about the effect on your body and mind.  Taste it and cook with it.  Make lotions together too!

For more fun with mint join me at our summer herb camp where we have a whole lot of magical minty ideas!

* Jeanne Rose’s Herbal Body Book is where I found this great way to make your own hydrosols.  I stumbled upon this awesome book years ago when I was a teenager.  For weeks I coveted and saved until I could purchase it and bring it home with me.  My first sojourn into making hydrosols with this method was way back when.  I made the most beautiful rose water right in my family’s kitchen.  So incredible!

References: 

Categories: Aromatherapy For Kids, Herbs For Cooking, Herbs For Kids and Mamas, Hydrosols, Kitchen Creations, Medicine Making, Science Exploration, Summer Herb Camp | Tags: , , | 1 Comment

♥ Summer Herb Camp: Week Four Squeaky Clean Bath Time Fun! ♥

Welcome to Mama Rosemary’s Herb Camp

Join us every week for a fun round up of projects and ideas to do with your kids during the summer.  Each week will have a theme with lots of projects to do using herbs, exploring science and natural, holistic living plus some great crafts for good ol’ fashion fun!  Many projects can be adapted for multiple age ranges depending on your child’s interests and developmental stage.

Let’s get squeaky clean 

with herbs and aromatherapy! 

Our fourth week of summer camp is all about using herbs, essential oils and other natural materials to care for our bodies all while having a blast!  First is a fully description about how to host a spa day for kids.  Then there are some great bath recipes that kids can make.  Finally, please find a little section for parents!   

♥ Spa Day For Kids  

Host a super fun, messy, gooey spa day for your little ones and their friends,

perfect for a hot summer day!

IMGP4239

This is a great way for kids to explore using natural materials to care for their bodies while providing a fun activity filled with tactile, creative opportunities.

Materials ~

Feel free to use any combination of the items below to create your own customized special day!

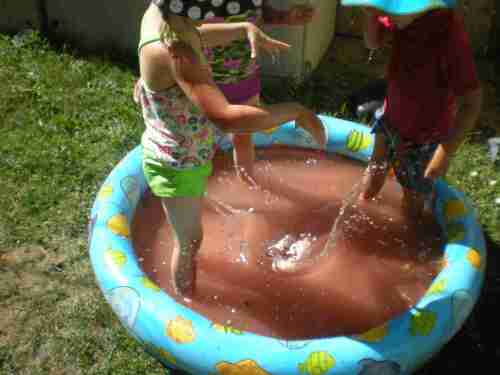
  • Kiddie Pool, this will be like a big bath tub!
  • Sprinkler
  • Clays ~ I like to use rose, french green and kaolin clays.  You really only need one clay but it is fun to have several different options with all the pretty colors to choose from.
  • Avocado ~ smashed up
  • Fruit Slices ~ I usually get whatever is on sale or in season.  What you want here are slices of fruit high in alpha hydroxy acids which help exfoliate the skin removing dead skin cells.  Sure, there aren’t many kids that will benefit from this action but knowing about it and feeling the effects of the fruit on there skin, that’s pretty cool.  Good choices are apples, grapes, strawberries, oranges and even lemons.  (I would be careful about giving little ones lemons to use though because they might get the juice in their eyes!)
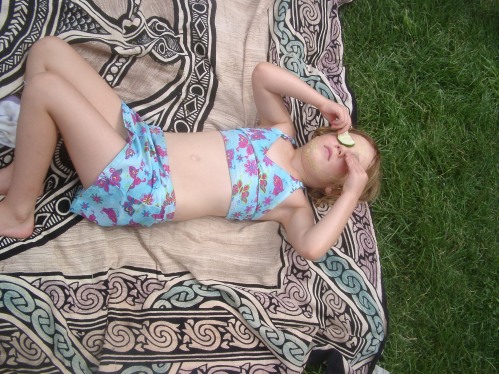
  • Cucumber Slices, kids think it is super silly that people put these on their eyes!
  • Bowl for Discards
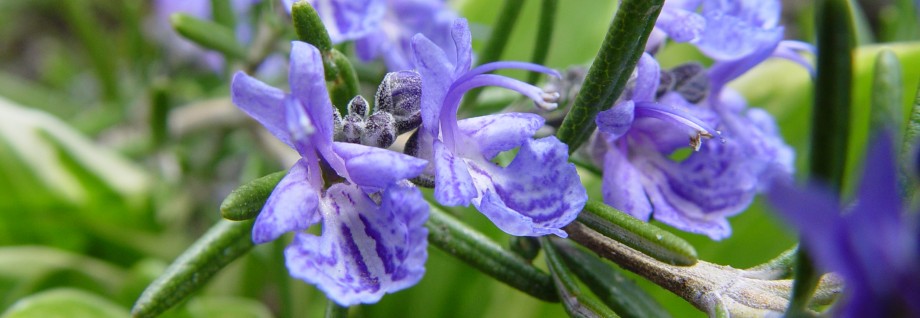
  • Stuff For An Herbal Bath ~ roses, lavender, chamomile, mints, calendula etc….  Also, epsom salts, oatmeal and essential oils like lavender, rosemary, rose geranium etc…  And cloth (with a band to tie it shut) or sock for making a bath.
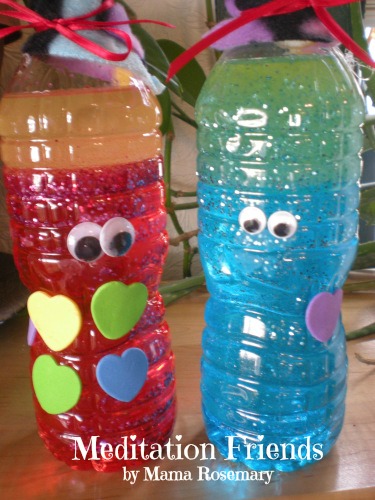
  • Aromatherapy Spritzer
  • Corn Starch

spaday1

Instructions ~

Fill the kiddie pool with water.  Place bowls with fruit, avocado and cucumbers outside on a table that is easy for the kids to get too.  You might want to put the table in the grass.  It is going to get really messy and the stuff that falls on the ground can become food for you lawn instead of a big mess on your patio!  Mix the clays with enough water to make a paste and put the clay on the table too.  Put your discard bowl under the table Make sure you have your spritzer and corn starch handy.

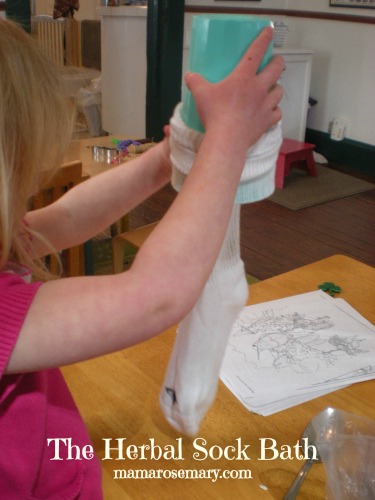
Get all of your bath ingredients set up over by the kiddie pool.  Then when you are ready bring the kids over and make an herbal bath with them.  I usually start this off by talking with them about the benefits of an oatmeal bath while I put the oatmeal in the sock (or cloth).  I make sure to tell them about how the oatmeal makes a slimy goo when you squeeze the bundle we are making.  Next we add some epsom salt.  Then show the kids all the beautiful herbs you have to add to the bath and ask the each to choose one herb they would like to add.  Give them each a handful to toss into the tub.  Next add a couple drops of essential oil, using a total of 5 to 8 drops at most.

spaday2

Next take the kiddos over to your spa table where all you fruits, clay and so on are set up.  And tell them all about how to use these fun substances.

  • The avocado is oily and nourishes the skin
  • Hydroxy acids in the fruit help exfoliate the skin
  • The clays help to nourish and tighten the skin
  • Cucumber slices on the eye reduce puffiness and refresh the eyes

The kids can use these to make art on their bodies too, making little patterns and drawings!  A couple of cautions: If you have young kids, be sure to tell them not to eat the fruits and veggies.  Explain that after a piece of fruit or cucumber is used it should be placed in the discard bowl and not back with the fresh pieces of fruit/cucumber.  Finally I always tell the kids not to put any clay around or above their eyes because when it dries, they clay begins to flake and gets into their eyes.  Trust me, this freaks them out.

Then let the fun begin!  Turn the kids loose!  Turn on the sprinkler if you have one.  If you want, you can walk around with the spritzer and spray it above the kids occasionally.

Finally, when the kids get tired of all the spa day activities, finish up with corn starch foot rubs.  The kids always love these.  Just have them grab a seat and give them little handfuls of corn starch to rub on their feet.  The corn starch is silky and cooling, and of course messy!

spaday4

Thanks for reading about how to host your own spa day.  It is so much fun and I hope you will consider giving it a try!

Next check out some fun baths to make for your kids to use in the tub!

♥ Baths For Kids To Make & Use ♥ 

Each of these baths are not only fun to make, they are great for body and soul!  

Just click on the pictures to get full instructions.

… create a customized Sock Bath full of herbs and oatmeal goodness, slimy and squishy skin nourishing fun!   

sockbath2

… become a chemist experimenting with acids and bases and blow up couple of volcanos, even one in your bathtub! 

volcano2

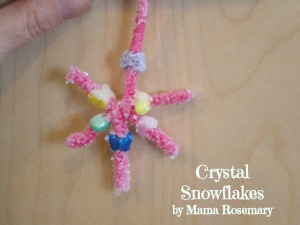
... create beautiful layered bath salts!  These were originally made as Holiday gifts but you could change around the scents to make it more Summery.  Consider using rose geranium, sweet orange or even ylang ylang.  Kids love to watch the layers build as the bath comes together.    

xmas-0272


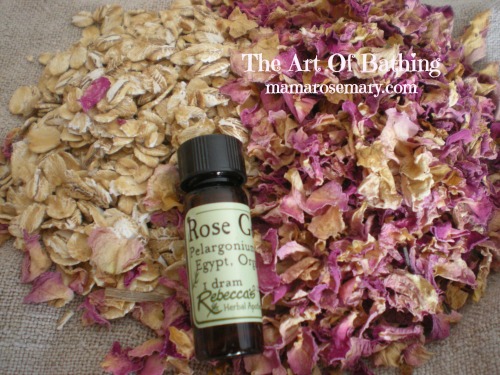
♥ Well Deserved TLC For Parents ♥ 

Summer time is fun and exciting but let’s face it, Summer can also be a bit tiring for parents.  It is important that as parents we take time to care for ourselves which also models healthy self-care for our children.  Please join me in a the honored art of bathing.  At the end of this post of a few lovely bath recipes perfect for soothing away the cares of any mommy or daddy.  

bath2

I am so glad you stopped by!  

Next week Mama Rosemary is on vacation!  Please join us again on July 20th for lots of fun crafts and tasty recipes using a beloved herb, mint.

In the meantime, if you are looking for herbal crafts and creations to make with your kids, check out Herbs For Kids.

Shared On: Eco-Kid’s Tuesday, The Kid’s Co-op, Wild Crafting Wednesday, Tender Moments, Friday’s Nature Table
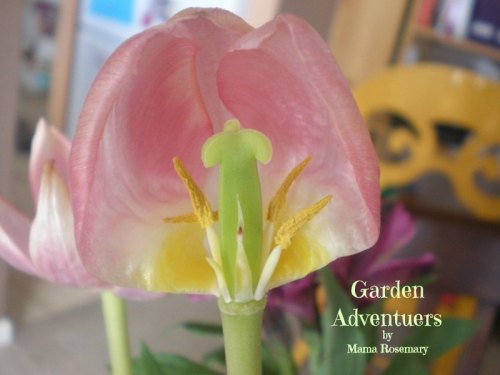
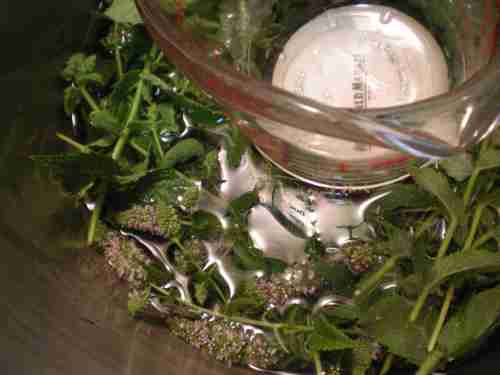
Categories: Bathing, Herbal Crafts And Projects, Herbs For Kids and Mamas, Mindful Self Care, Natural Family Care, Parenting, Playing With Herbs, Practices For Intentional Living, Science Exploration, Science Investigation, Summer Herb Camp | Tags: , , | 2 Comments

Playing With Lady Bugs

lady bugs in search of aphids

What kid doesn’t love bugs?  Butterflies, caterpillars, rollie pollies and lady bugs are some of the most treasured critters in the garden.  I even know a child who has a deep love and respect for spiders.  Of course not every child loves bugs yet many do and lady bugs are among the most enchanting of bugs and are very approachable for most kids.

lady in hand

Recently I brought in a big bag of lady bugs to play with at the preschool.  (I purchased them at our local flower nursery.)  Before we let the lady’s go in our garden, we started out our lady bug exploration with a book all about the lady bug life cycle, Grub To Lady Bug by Melvin and Gilda Berger.

There are great pictures of lady bugs in different parts of their life cycle in this book including the larval stage when they look nothing like that lady bugs we are used to seeing.  The kids really were engaged reading about these familiar little insects.   While reading we talked about how many legs a lady bug has and about how lady bugs help our gardens be healthy by eating bugs that harm plants like aphids; aphids who suck all the nice juice out of plants and make them feel bad.  At this point one of our littlest girls who is just 3 years old, exclaimed “like the Grouchy Lady Bug!”

~ A Simple Art Project ~

Has you may know from my post about salt dough finger prints, I love to capture the precious cuteness of little fingers, hands and feet.  So as part of our lady bug exploration we made lady bug pictures with the children’s little red finger prints for the lady bug’s body.  The kids drew in the details of lady bugs often including six legs and even flowers for the lady bugs to protect.

Here are some wonderful examples of our art work:

~ Lady Bug Release ~

Finally the big moment came when we released the lady bugs into our garden.

The kids squealed and giggled as lady bugs crawled out of the bag in droves.

releasing lady bugs

They crawled everywhere, up my arm, all over the ground and on our spinach plants.

Super duper buggy fun!

lady's on spinach

We spent the rest of the morning gently holding lady bugs and watching them find a new home among the plants.

A Cherry Tree In Trouble ~

About a week after the release at school, my daughter and I discovered our cherry tree at home covered in black cherry aphids and we knew just what to do!

Off we went to our local nursery to get some more lady bugs.

coming out of the bag

Here are the lady bugs coming out of the bag onto our poor cherry tree!

 We let them go all over the tree and we could see the lady’s immediately getting to work chowing down on those aphids.

lady bugs finding aphids

It has been less that a week and the tree already looks so much better.

Like it’s energy is coming back, the leaves are greener and it seems to be standing stronger.

My daughter had a great day playing with the lady bugs and running back over to the tree every now and then to check on their progress.

Have you ever used lady bugs to control pests in your garden?  I would love to hear how it went for you.

For More Buggy Fun Check Out ~

Shared On:  Eco-Kid’s TuesdayThe Kid’s Co-opIt’s Playtime!Tender Moments, Friday’s Nature Table, Kid’s Get Crafty

Categories: Gardening, Insects, Lesson Plans For Preschool And Home, Science Exploration, Science Investigation | Tags: , , , , | 5 Comments

Adventures With Earthworms

Many happy days were spent stalking bugs when I was a little child.  I had an array of bug catchers and I knew where all the good places were to find a new pal.  My often caught favorites were roly polies.  I also sought after treasured lady bugs, butterflies and caterpillars which were hard to come by and when I would find one, I would be enchanted with my imagination completely sparked.  So, can you guess what one of my favorite things to do with kids?  Play with bugs of course!  Many, many summer days have found my girls and I “hunting bugs” and going on “roly poly” walks with bug catchers in hand. a wormy friend

The Helpful Earthworm

The preschool I teach at has a wonderful garden that the kids help to grow every summer.  They get to help plant, water and even pick food for the healthy lunches and snacks we serve. This spring we spent a couple weeks studying a couple beneficial friends for our garden, lady bugs and worms!  Naturally when we were done learning and reading we added some lady bugs and worms to help our garden grow.  Worm in it's new home

“Ms. Angela!  Did you know worm poop is dirt?”

After a nice little discussion about earthworms and how they help enrich our soil enabling plants to grow healthy and strong, we continued our study of worms by making a worm farm.  There are a large number of sites to find information on making your own worm farm, with much more detail than what we did.  Here is a quick run down of what we did if you want to make something super simple.

MYO Worm Farm

Materials ~

  • Earthworms:  I got a huge amount at our local garden centers ~ more than enough to make 2 worm farms which we did, one for school and one for home.  
  • Dirt
  • Sand
  • Worm Food: Things like grass clippings, leaves, food bits, oatmeal, tea leaves and coffee grounds, shredded newspaper.
  • Water
  • Container For the Farm:  We used a salad green container.  You know the kind that has washed lettuce in it?
  • Dark Paper

Instructions ~

Layer the dirt and sand in your container to make distinct layers so you can see the soil get all mixed up by the worms.  We even used oats for layering at home because we didn’t have sand.

DSCN4364

Add the food bits to the top of your worm farm.

Here we used a bit of old grass clippings and dandelion flowers.

food bits

Dump your worms in and watch them bury themselves deep into your farm.

Check it out, so very many worms!

adding the worms

Give your farm enough water to keep it moist but not water-logged.

Put a lid on your farm making sure to poke holes in the top so the worms and the farm can breathe.

Cover the sides of the farm with dark paper to encourage the worms to come to the sides of the container.  If you are lucky, you may see the dirt/sand layers get mixed up and little worm tracks along the sides.  We got to see lots of worm tracks one year, but sadly not this year.

Keep your farm in a nice coolish place (but not too cool) and check periodically to see what your worms are up too and to make sure they have enough water and food.

When you are done enjoying your farm, release the worms into your garden!

worm being released into the garden.

We also read this wonderful book to help us learn more about worms:

Diary Of A Worm by Doreen Cronin

This book offers a humerous way to look at worm life and learn about worm facts as well as how worms help our planet.

Wishing you lots of wormy fun!

For more buggy fun visit Playing With Lady Bugs

Shared On:  The Kid’s Co-op, Eco-Kid’s TuesdayIt’s Playtime, Kid Lit Blog Hop, Tender Moments, Friday’s Nature Table

Categories: Gardening, Insects, Lesson Plans For Preschool And Home, Science Exploration, Science Investigation | Tags: , , , , , | 9 Comments

Blog at WordPress.com.